Sunday, March 24, 2013
Saturday, March 23, 2013
Sunday, March 17, 2013
Dead Bug Society
I had the opportunity
to take a couple days off work
and take a soldering workshop
with Sally Jean
Her classes are always a mystery
You have a class title
a supply list
and a snippet of a picture
......thats it
This workshop was
A M A Z I N G
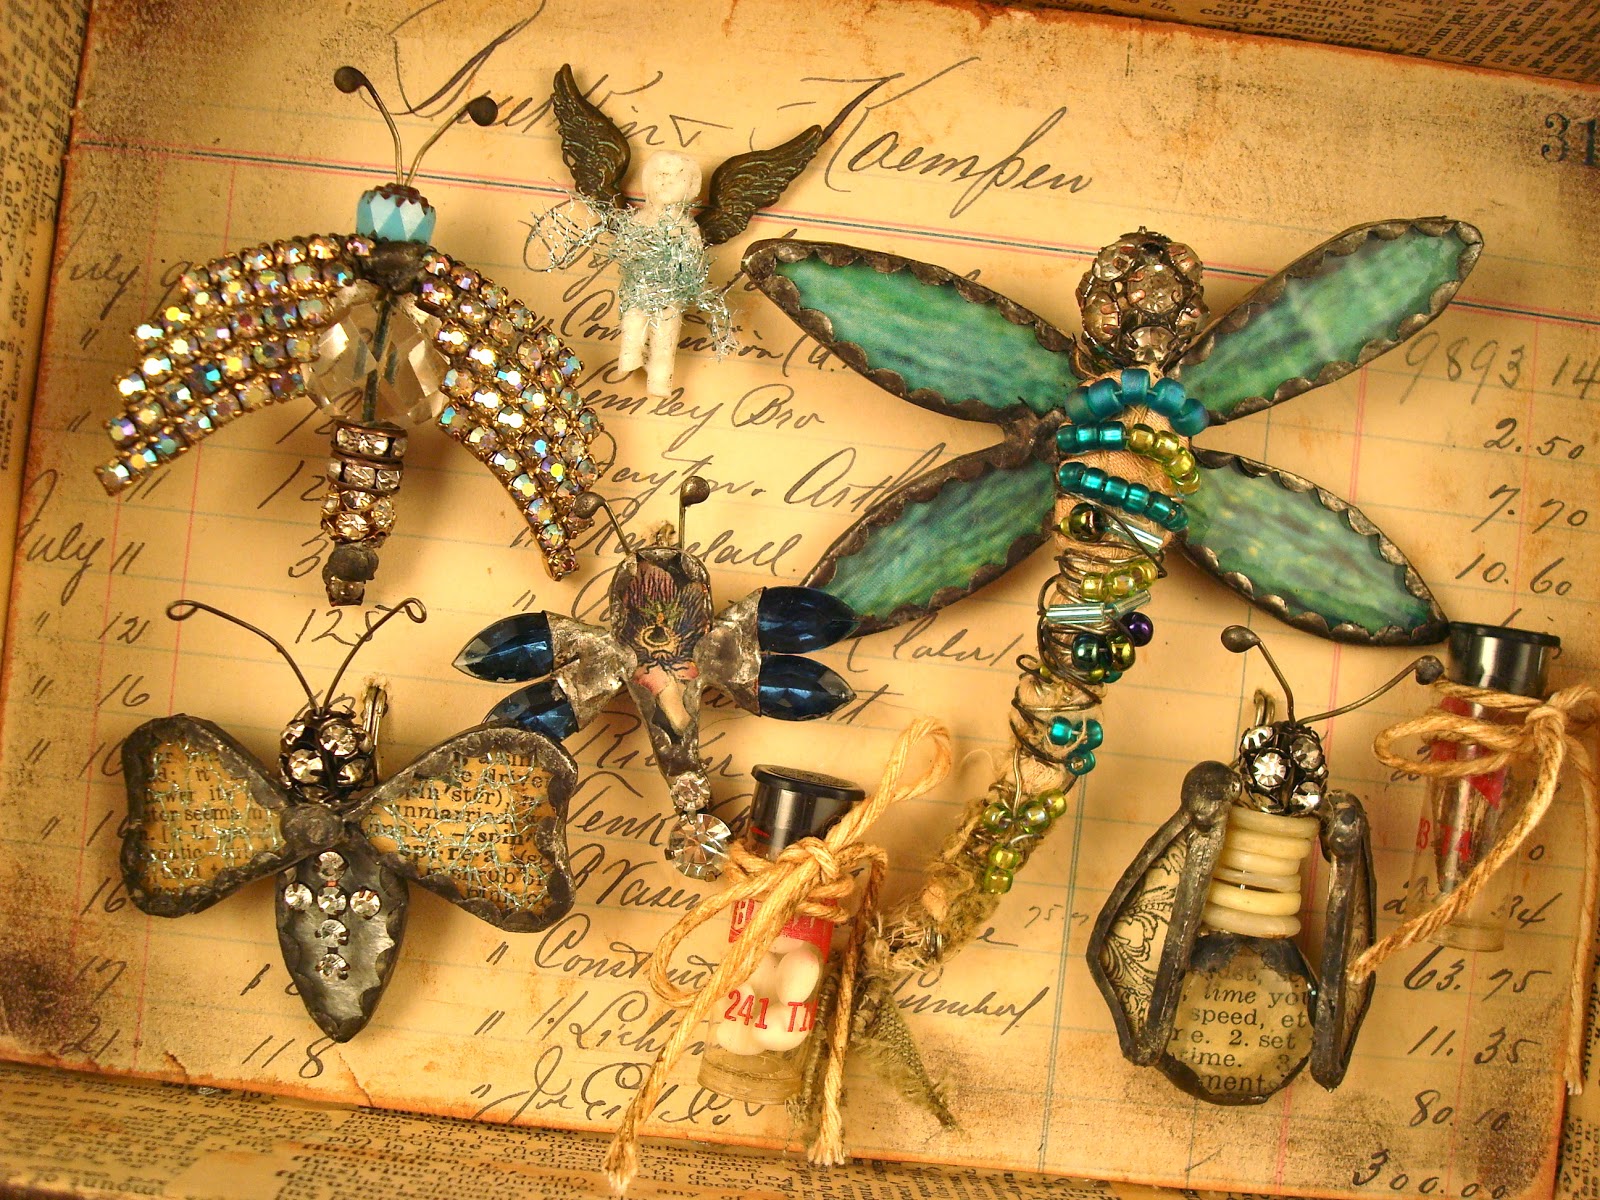
This is my finished
Bug Box
I didn't quite finish it
in two days...
But I worked on it Saturday
and finished it
At home I had all my
supplies to choose from
I added some little bottles
that I filled with eggs
And a dead moth that I found
I love the little hornet
These little bugs were challenging but I have been practicing my soldering skills and it seemed to get easier the more I made
The dragon fly was fun to make
I just love my little bugs
Im over the moon
happy with this project
I see more bugs in my future
The soldered kind of course
Robin
Saturday, February 16, 2013
Repurposed Chandelier Crystals
Last year we started doing a little re-decorationg at work
My boss took all the crystals off the chandeliers in the dining room
.......a 5 gallon bucket full
Guess who she gave them to??
☛ ME
Today I decided it was time
to take a break from crocheting
and do a little soldering
I really need the practice
Here are some of those
crystals made in to necklace pieces
Some are flat backed
and smooth on the front
And some are faceted on both sides
I think tomorrow
I will pull out the jewelry stuff
and make some necklaces
But probably not
until I crochet a little bit!
Robin
Monday, February 11, 2013
The Big Bow Headband pattern
As promised here is the
Big Bow Headband
pattern
Please note the terms of use at the
bottom of this page.
N Hook
1 skein Lyon brand
Wool Ease Chunky - Wheat
♥ Headband ♥
Chain 42
Row 1 - hdc in 2nd chain from hook and in each chain across, ch 1 turn (41 hdc)
Row 2 thru 8 – hdc in back loop only ch1 turn
(41 hdc)
Fasten off leaving tail long enough to sew ends together with.
Matching rows whip stitch ends together.
Weave in ends.
♥ Bow ♥
Chain 21
Row 1 - Sc in 2nd chain form hook and in each chain across, ch 1 turn (20 sc)
Row 2 thru 12 sc in back loop only ch 1 turn (20 sc)
Weave in ends
Place center of the bow over the seam on the headband and wrap the yarn tightly around the two pieces. This could take a few to several yards of yarn depending on how many times you want to wrap the yarn. I did a few wraps then adjusted the bow to be sure it was centered and scrunched to my liking. Then I continued to wrap till it looked like I wanted. Tie your yarn off in the back being sure that your knot is not in the center of the wrap. Tie it either near the top or bottom this way the knot is not poking you in the forehead. Weave in the ends.
Helpful Hints:
Wool Ease Chunky - Wheat
♥ Headband ♥
Chain 42
Row 1 - hdc in 2nd chain from hook and in each chain across, ch 1 turn (41 hdc)
Row 2 thru 8 – hdc in back loop only ch1 turn
(41 hdc)
Fasten off leaving tail long enough to sew ends together with.
Matching rows whip stitch ends together.
Weave in ends.
♥ Bow ♥
Chain 21
Row 1 - Sc in 2nd chain form hook and in each chain across, ch 1 turn (20 sc)
Row 2 thru 12 sc in back loop only ch 1 turn (20 sc)
Weave in ends
Place center of the bow over the seam on the headband and wrap the yarn tightly around the two pieces. This could take a few to several yards of yarn depending on how many times you want to wrap the yarn. I did a few wraps then adjusted the bow to be sure it was centered and scrunched to my liking. Then I continued to wrap till it looked like I wanted. Tie your yarn off in the back being sure that your knot is not in the center of the wrap. Tie it either near the top or bottom this way the knot is not poking you in the forehead. Weave in the ends.
Helpful Hints:
Always turn your work the same way at the end of each row. This way your ends are uniform. To adjust the size, just add more or less chains when making the starting chain.
For this headband I used
an N hook and
2 strands of worsted weight yarn
held together
Chain as many as needed
to fit around your head snugly
but not too tight.
To do this
I usually make the chain
trying it around my head as I go
writing down how chains I made.
(so you know for the next try to add or subtract)
Then I crochet two rows
and fit it around my head
to see if it fits the way I want.
If its good, I keep going.
If not I frog it and start over
adding or subtracting
chains as necessary.
(this is why you write down how many chains you started with)
The double strands of yarn
work up like bulky yarn.
This is the first pattern I have written so let me know if you have any questions.
✽ Enjoy ✽
Robin
This is the first pattern I have written so let me know if you have any questions.
✽ Enjoy ✽
Robin
Please use this pattern for personal purposes, gifts, or charity only and don’t sell the finished product or the pattern. Please don’t copy the pattern either. You can feel free to link to my blog. Thanks!
Subscribe to:
Posts (Atom)